Category Archives: Community Roofing

Why Roofing is Important for Your House and Building

Why Roofing is Important (Blog Cover)

Roofing is important for various reasons, including your property’s value, well-being, functionality, and usability. While many people may overlook their roofs in favor of other aspects of a home, the roof is what shelters man. Of course, shelter is a fundamental need. But roofing is vital for many other reasons. 

Here at Roofer’s Guild, we are on the roofer’s side. We work with roofers and help them expand their businesses. So, we wanted to take some time to reiterate the importance of roofing to both roofers and consumers. 

Discover why roofing is the most critical aspect of your home or business. 


Roofs Improve Curb Appeal

Many property owners have the luxury of building aesthetically pleasing roofs – apart from building them to provide adequate protection from the elements. A roof can improve the curb appeal of your home. The right roof can also make your home more desirable to potential buyers. 

If you plan to sell your home shortly, you should be aware that the quality and looks of your roof will undoubtedly add (or detract) from the overall value of your home. For instance, a new roof can increase the value of your home by an average of $15,000

Of course, much of the ROI will depend on the initial roofing construction, what materials you use, and the quality of the craftsmanship. But these days, people are using their roofs to make a statement. 


Luxury Home with Roof Tiles

With the advent of custom soffits, fascia, and gutter systems, you can dial in the look of your roof to accent the rest of your home and outdoor areas.


Roofs Help Insulate Your Home

Maybe you have never lived in a house that didn’t have an insulated attic or roof. But if you have, then you know how uncomfortable it can get.

So, another vital role of your roofing system is to provide insulation for the lower living areas. An adequately insulated roof will help keep your living areas cool in the summer and warm in the winter. 

That’s not to say that you will never need to use your HVAC system just because your roof is insulated, but it will help keep your cooling and heating costs down.

For example, the EPA estimates that proper attic and roof insulation will reduce your heating and cooling bills by 15%.

Modern insulation and roofing materials are also improving at keeping your living areas comfortable in inclement weather.


Waterproofing and Insulating PVC

Expect your roof to play an even more significant part in insulating your home against the elements as time passes. 


Roofs Protect from Water Damage

Unfortunately, many things can cause water damage in your home: a leaky underground pipe, a malfunctioning water heater, and even overly humid air. But with a properly installed roof, you won’t have to worry about water damage from rain and snow. 

One of the essential roles of a roof is to protect the structure underneath from water damage. Many people take it for granted, but the next time you’re outside, take a good look at the structure of your roof. 

There is a perfect reason why the roof creates eaves – portions of the roof that extend out past your exterior walls. It’s to channel water away from your foundation and the exterior walls of your home.

The roof’s slope is also designed to drain water down off the structure so that water doesn’t get into your attic and damage your ceilings and walls. Even your gutters and downspouts help channel water away from your foundation.


Marks On Ceiling From Water Erosion

Everything about your roof’s design protects your home and building from water damage that can cause thousands of dollars in damage and pose a severe health risk


Roofs Add Dynamism to the Structure

Think about your home’s interior design. Maybe you have a sunken living room that you love or recessed lighting that affects just the right atmosphere. Interior design features are made possible by your roof. 

Your roof provides crucial structural support for your home and allows for a more dynamic design. The roof also allows for special wiring and ceiling construction.

Many people like high ceilings that give buildings a more expansive feel. Well, guess what? High ceilings wouldn’t be possible without the structural support of a well-built roof. You can see your roof as the structure that holds your entire house together. 


Roof Under Construction Using Lots of Tiles

While every part of the building more or less works together to contribute to the strength of the structure, the roof plays an integral role as it covers the entire building. 


Roofs Speak to the Quality of the Structure

Lastly, the roof is one of the most prominent features of your home or business’s exterior. When your roof looks shabby and unkempt, people perceive the entire building as ragged, bedraggled, and maybe even unsafe.

That’s bad enough for a residence, but imagine if that’s how your commercial building looks. Chances are, you’re going to lose out on some customers.

With this in mind, viewing your roof as an extension of your property and one of its most critical components is crucial.


Roof in Construction with Slate Tiles

Property owners should consider their roofs as an extension of their building and, in many cases, their company.


Final Thoughts on The Importance of Roofing

Property owners should not underestimate the importance of roofing. As you can see from the points outlined above, roofs help increase your property value while protecting it from the elements and keeping occupants healthy and safe.

Whether you are a residential homeowner or a commercial building owner, the roof represents a foundational element that will determine the functionality of the property.


5 Clear Signs It’s Time to Re-Roof Your Multifamily Complex


Multifamily Re-Roof (Blog Cover)


Re-roofing a multifamily building is not something you want to do until it becomes necessary. Ideally, you want to put off this investment for as long as possible. Yet, at the same time, you do not want the condition of your roof to be the reason your property is losing money.

At Roofer’s Guild, we stress the importance of knowing when the roof absolutely needs to be replaced, and doing it will be a further investment in the continued success of your business. In the highly competitive world of rental housing, a good roof makes a lot of difference.

According to SGI Management Dallas, the roof plays a huge factor in how much money you save on the property. Being a vital part of the building envelope, it profoundly affects the building’s energy efficiency. Roofs also influence how much you spend on maintenance since they protect the building from damage. 

It is not enough for your roof to be functional; the roof of a multifamily complex should also be beautiful. It should help the property stand out and give you the ability to make a style statement. In addition, a multifamily building will attract more renters if it has an attractive roof. 

The roof plays a significant role in your marketing. Roof maintenance should also feature as a major part of your overall maintenance. These are two good reasons to keep your roof in good condition. How can you tell when it is time to re-roof your multifamily complex?


Signs it is Time to Re-Roof Your Multifamily Complex


1) Aging Roof

How old is the roof? Every roof has an expected lifespan, which depends on the type of roof. Asphalt roofs will last anywhere from 15 to 30 years. You can expect a metal roof to last 40-70 years, depending on the material. Clay and cement roofs can last 50-100 years. 

In addition to the roofing material, maintenance plays a role in the longevity of your roof. If you follow the manufacturer’s program for maintaining the roof, you will get it to last longer than its projected lifespan. It is always good to start planning for roof replacement once the roof approaches the end of its projected lifespan.


A multifamily roof’s lifespan may vary depending on maintenance, installation methods, and climate factors
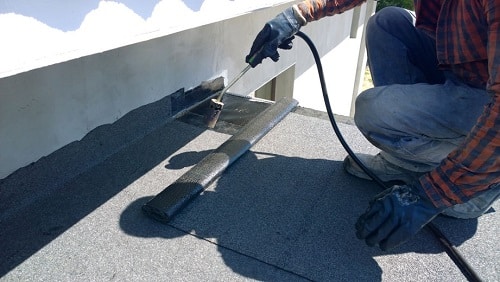

2) Repair Costs

Due to the sheer size of the roof on your multifamily building, you may have at least one roof-related repair every month. These will often be minor issues that don’t cost a lot of money.

But the time may come when the repairs on your building’s roof start to stack up. Then, you could find yourself having to deal with the same kinds of issues repeatedly. 

If you notice this, it is time to calculate your monthly roof repair costs and compare that cost to your monthly payments if you took a loan to reroof the building. If the cost of repairs is anywhere near the monthly payments for a roof replacement loan, you should reroof the building.


Multifamily roofs typically require frequent repairs, primarily because of the building size


3) Community Upgrade

There is no better time to reroof the building than when you are ready to give your property a facelift.

Just as with your primary home, you constantly need to update the appearance and function of your multifamily complex to stay competitive. But you won’t get much mileage out of the renovations if you only repaint the home but leave the old, faded, or discolored roof.

If it will cost too much to do a sweeping renovation of the entire property, it is usually better to wait until you can do this. An excellent way to lessen the financial burden of renovating the property is to update the appearance of one section of your property at a time.


Commercial Flat Roofing Contractors Apply Material

Consistent upgrades to your multifamily complex will help maintain its appeal and stay competitive


4) Property Additions

If you plan to add new buildings to your property, you should consider including roof replacement and other improvements as part of the project. If you add a new building while the old ones retain their old appearance, you will only get a disjointed look that will not benefit your property.

To maximize the impact of the new building, you need a matching roof design for the entire place. Another reason to reroof the building at this time is you may not find a design that will match the new roof precisely if you decide to reroof the property later.


Green Roofing Systems With Terrace Area

Property additions are a great time to take care of roof replacements for your multifamily building


5) Building Roof Damage

Your roof may start to deteriorate before it gets old. There are several reasons why this can happen. The main reasons are the climate in your area, improper roof installation, use of substandard materials, and natural disasters. 

If the roof shows signs of premature failure, you will have no option except to reroof the property. In this situation, speed is essential because as long as the roof is not replaced, it will endanger the rest of the building. Failing to act now means you will only spend more money to solve the problem down the road.


Damaged Flat Roof Membrane

Significant damages to your building roof should prompt you to re-roof your multifamily complex


How To Get Satellite Roof Measurements With Google Earth


Satellite Roof Measurements (Blog Cover)


The following post outlines how to get satellite roof measurements with Google Earth. As a roofing contractor in 2024, you are probably looking for ways to cut your operating costs anywhere you can.

But, at the same time, you don’t want to diminish the quality of your services or customer relations. 

Did you know that you can get satellite roof measurements using Google Earth? One important thing to note, though, is that Google Earth still can’t account for roofs’ pitch or slope degrees.

Therefore, it will only help calculate the area of flat roofs. 


Getting Started

The first thing you will need to do is get Google Earth Pro installed on your computer or mobile device. You can download Google Earth here. It’s simple and best of all: it’s free! After installation, open the app.

You will see an image of the Earth. This screen is essentially your dashboard, and it will allow you to access all of the features available to you.

The next thing you will want to do if you take satellite roof measurements is uncheck the 3D Buildings option underneath the “Layers” menu on the bottom right-hand side of the screen.


Screenshot of Google Earth Settings for 3D Buildings

It may not be automatically checked, but you should double-check anyway because having this setting on will interfere with your roof satellite roof measurements. 


Find Your Building

Now, you are ready to locate the building with the roof you are trying to measure. On the top left side of the screen, you will see a search field.


Screenshot of Address Search on Google Earth App

All you have to do is enter the address of the building you are trying to take measurements for and press Search. 


From here, you should be able to see a bird’s eye view of the building and, more importantly, its roof. Now, you can zoom in on the roof. Using a computer and mouse, you can rotate your scroll wheel to zoom in on the roof. 

You will also see a zoom tool on the right side of the screen. You can click on the “+” end to zoom in. 

You will have to keep the roof centered on the screen as much as possible to get accurate satellite roof measurements.

To do this, hover the cursor (in the case of Google Earth Pro, the cursor is a hand) over the center of the roof, click it, and move it around until it’s as close to the center of the screen as possible. 


Align The Roof

For the easiest measurements, you should align the longest edge of the roof so that it’s parallel with the top of the screen. To achieve this orientation, you may need to rotate the image. 


Screenshot of Google Earth Rotate for Alignment

A circular “rotate” tool in the top-right corner will allow you to rotate the image clockwise and counterclockwise. Click it until you get the optimal orientation. 

Measure The Roof

On the left-hand menu, click on the option for “Tools.” Then, check the box next to the option “Ruler.” This will open up a prompt with the option for something called “Polygon.” Go ahead and click on Polygon. 

This will give you an option to select measuring units. You should go ahead and choose feet and square feet. 

Now, you’re going to want to drag the ruler box out of the field of view (the part of the screen that actually displays the image of the roof. Move it to the left so it is completely out of the way of the field of view, but be sure not to close it. 

Hover back over the roof image, and you will see that your cursor is now a little square. Align the square into one corner of the roof and click and hold your mouse. 


Screenshot of Google Earth Measurement Process

Now, while still holding down the mouse button, move to the second corner of the roof. Continue this process until you have rounded the entire perimeter of the roof. 


Getting The Roof Area

Once you’re done covering the roof’s perimeter, take a look at the little “Ruler” option box that you dragged out of the way. It should give you the area of the roof. 


Screenshot of Roof Area from Google Earth App

Now you’re done! You can repeat this process to get satellite roof measurements for any flat roof!


FAQs about Measuring Roofs With Google Earth

How Accurate are Google Earth Roof Measurements?

Google Earth is good for estimated measurements. However, you should still conduct professional field measurements before ordering more materials. The goal is to remain within your budget and get the job done.


Are There Video Tutorials for Google Earth Roof Sattelite Measurements?

Yes, several YouTube videos outline how to measure your roof on Google Earth. Sometimes, seeing a real-time video can make the process easier. Here’s one example of a video that outlines the process


The Lifespan of Roofs in Florida (Tile, Shingle, Metal, etc.)


Blog Cover for Roof Lifespan in Florida


The Florida climate can be brutal on your roof. Between the near-constant sunshine and the sea spray, Florida is one of the most taxing states for roof durability. 

Unfortunately, there is no universal lifespan for a roof in Florida. It will depend on many factors.

However, in the following post, Roofer’s Guild provides a general idea of how long you can expect your Florida roof to last.

We also offer insights into why Florida weather can be so damaging to roofing systems (both residential and commercial) and what you can do about it. 


Asphalt Shingles

Asphalt shingles are common because they are affordable. However, they don’t hold up very well against Florida weather compared to other roofing materials. 

In general, you can expect your asphalt shingles to last between 15 and 30 years in the Florida climate. That sounds like a lot – and it is for how much it costs to install an asphalt shingle roof. 

But as you will see as we work down the list of materials, asphalt shingles are near the bottom of the list of durable roofing materials for Florida weather. 

One of the best things that asphalt shingles have going for them is their low profile. As a result, asphalt shingles can be rated class H, which means they can stand up to winds of up to 150 MPH. 

Of course, you can expect to pay more for class H asphalt shingles than you would for, say, class D-rated shingles. In contrast, asphalt shingles are susceptible to moisture and UV exposure. 

The fluctuation between wet and dry/hot conditions can break down the granules that top asphalt shingles and weaken defenses. 


Close Up of Asphalt Roof Shingles

Asphalt shingles last between 15 and 30 years in Florida, making them a popular roofing material for Floridians.


Metal Roofing

Metal roofing is ideal for Florida. Metal roofs typically last between 15 and 50 years in the Florida climate. In addition, they are rated to withstand extremely high winds, undoubtedly a boon in Florida. 

They are also not as susceptible to salty air as some other common types of roofing systems. Metal roofs are made from galvanized steel to hold up well to rust.

Unlike tile and asphalt roofs, metal roofs stand up much better to UV rays. This is because the inorganic material doesn’t break down after prolonged exposure. 

Installation is the only thing you have to worry about with metal roofs. If they are not installed properly, they will not provide optimal protection.

Metal roofs typically come with excellent warranties – a testament to how long they generally last and the low maintenance cost. However, whether you want a metal roof for your home or business, expect to pay near top dollar.


Metal roofing

Metal roofs last between 15 and 50 years in Florida while withstanding high winds that are typical in the climate.


Tile Roofing

Tile is a reasonably close runner-up to metal in terms of durability. They stand up well to UV exposure and aren’t as susceptible to salt air as other natural roofing material types. 

Generally, you can expect a tile roof to last 20-50 years in Florida. The main concern with tile roofing is the relatively high profile. Tile roofing will generally sit higher off the roof decking than other materials, making it more vulnerable to extremely high winds. 

Conversely, a material like metal can stand up to winds of 180 MPH; tile roofs typically top out at 125 MPH.

However, the winds would have to be very high to pose a threat due to tile roofs’ weight and installation (again, when done correctly). That all being said, another downside to tile roofs is their weight.

The weight of tiles tends to strain the structure and sometimes requires reinforcement. 


Roof Tiles On a House

Tile roofs last between 20-50 years in Florida though they may require reinforcements over that span.


Shake Shingles

Wood shingles (also known as shake shingles) offer decent protection from the Florida sun and wind. However, they are susceptible to the elements differently than all the other materials we have covered so far. 

If you have lived through any summer in Florida, you know that the humidity can be relentless. This can be bad news for wood shingles because they can gather moss, mildew, and even mold in humid conditions. 

Shake shingles must be maintained very carefully to last a long time in Florida. You can expect your wood shingles to last between 10 and 40 years with the proper maintenance. 

One of the most important things to remember about wood shingles is that you have to make sure there is no standing water on them for more than a couple of days. 


Roof with Shake Shingles

Shake shingles last between 10 and 40 years in Florida, depending on maintenance frequency and weather.

Factors Affecting Roof Longevity in Florida

The following factors may impact the longevity of a roof in a typical Flordia climate:

  • UV Exposure: Hot summers and direct sunlight can break down organic roofing materials and cause premature aging.
  • Humidity: High humidity can cause mold or mildew to grow on your roof and within the internal structure.
  • High Winds: Florida is home to high coastal winds that can pull up shingles and send debris crashing onto roofs.
  • Salt Air: Salt content from the sea breeze can be highly corrosive to some roof materials. 


Roofing Work in Florida

If you are a roofer operating in Florida, your customers will often ask about the projected lifespan of a roofing system.

Answering these concerns with confidence is a great way to promote your business and earn referrals.

While you may not have time to think about roofing marketing, it is essential to the success of your business. So try investing in Florida Roofing SEO to get those replacement jobs that pay big money.


How To Build a Greenhouse Roof in 2023 (Step by Step)

How To Build Rooftop Greenhouse (Blog Cover)
Logo

Step By Step for Building a Greenhouse Rooftop

  1. Gather Supplies
  2. Build a Base Deck
  3. Apply Plastic Covering
  4. Implement Hydroponic System
  5. Create Planter Boxes
  6. Create Pant Buckets
  7. Start the Process With Water and Nutrients

Many people want to know how to build a greenhouse roof. More and more these days, people are investing in their own greenhouses. This is for a variety of reasons. Most importantly, you can grow a considerable amount of food in a greenhouse.

This would not only save you a little bit of money over having to purchase your vegetables, but it would save you a trip or two to the grocery store as well. Sometimes, the latter is invaluable.

There is, of course, the matter of hydroponics. Regardless of what side of the fence you may reside on, marijuana is becoming legal in more and more states, and there is a real market for growing your own.

Even if you are looking to dabble, having a greenhouse would be a great way to see what you can grow and in what quantities. The thing is, building your own greenhouse can be a bit difficult if you have no idea what it is you are doing.

Finding the right supplies can be difficult without the proper knowledge. Having space is difficult enough; don’t go through the process without a little bit of knowledge about how to get it done properly. The goal is to ensure that you set up a system that is as simple to use as possible.

You want to make it so that maintaining it isn’t a huge chore, and you can have productive growth each time you use it. This all lies in the construction.

Thankfully for you, you have a helpful guide right here on how to safely and accurately construct a greenhouse on the rooftop of your home or apartment building, so long as you have the right clearance beforehand.

Follow these steps, and you can grow so many things in your new greenhouse.

Step 1: Get Supplies

You will need to get several things beforehand to ensure that you properly construct your rooftop greenhouse.  Start with:

  • 18x plastic pots
  • 3x 100lt plastic boxes
  • 5x standard 2×4 wood
  • 1x3m aluminum profile
  • Some thin wood strips
  • 14x small plastic containers (you can also use recycled containers)
  • 2x 19lt buckets (again, you can also use standard buckets like paint buckets)
  • 6m x 6m greenhouse plastic (be certain that it has a UV coating; otherwise, it will degrade quickly)
  • Annealed wire, a small roll
  • Vermiculite substrate
  • 3x metal grids of 120mx60m
  • The necessary nutrients for the vegetables or plants you plan to grow (if you plan to grow hydroponics, that will require separate nutrients)

This isn’t 100% a science; if you think you can apply other items instead of something on this list, that is entirely your call. Just make sure that those materials can serve the same purpose. Otherwise, you’ll have a point of failure that you might not be able to get around. The key to any project is ensuring that your materials are of the quality that you need to do a quality job.

Step 2: Build a Base Deck

If you are building your greenhouse on top of your roof, one of the things that you want to do is to allow airflow into your greenhouse and prevent humidity problems for the roof below.

For this reason, you need to construct a wooden deck to act as a buffer between the roof itself and your greenhouse.

This is especially important if you are doing this on top of an apartment building; the last thing you want to do is screw the roof up and wind up owing people money.

Rooftop cage

Ensure proper airflow can enter your greenhouse, which will prevent humidity. You’ll need a wooden deck to serve as a buffer between the roof and the greenhouse.

To construct the deck, you would need to use six segments of 2”x4” 120cm wood connected on top with as many as 15 strips of thinner wood; what type of wood is up to you? Just make sure that it is sturdy and durable.

Remember that you will be standing here, so ensure that the spacing is small enough to take your steps safely and comfortably.

Use 3” nails on each node to secure them together, and you have a floor for your greenhouse that will be safe and secure and prevent any issues with the rooftop below.

Step 3: Plastic Covering

There is one thing worth noting: some apartment buildings will offer a mesh caging for you to use as the basis for your greenhouse. If yours does not have this, you will need to build the framing for your greenhouse.

Once your framing or caging is in place, it is time to take on the most important step: covering everything with plastic.

Make sure that you measure the cage or your frame and cut out the plastic to the proper sizing, making sure to add in the neighborhood of 20cm on each side to ensure that you get the necessary fit and closure. Remember that the plastic is thin and can be easily torn if not correctly fixed.

To prevent tearing in the plastic, place a strip of wood on the corner from the inside portion of the plastic and then secure that strip to the cage or frame with a few pieces of that annealed wire that you bought.

It will pierce through the plastic and tie tightly on the other side. Make sure your plastic is snug but won’t rip, and you have one of the most important aspects taken care of.

Step 4: Implementing a Hydroponic System

The term “hydroponics” has a certain meaning attached to it, but really it just means that plants are being grown in a medium that will ultimately provide no nutrients to the plant but will allow them to soak their roots in a solution of nutrients that will provide the necessary amount of nutrition to the plant.

This method ensures that the plant’s nutrition is properly adjusted and controlled while also allowing the plant to absorb the nutrients as easily as possible. This helps to improve the growth speed and helps to boost production.

Simplicity is the key here. You would want to have containers where the water and nutrients sit and create a platform or container above where the plants could sit. This would allow the roots to grow down and into the nutrient solution instead of simply sticking the roots into the nutrients.

However you choose to create this system, this will allow for ample nutrient soaking, and you can even leave your greenhouse unattended for a couple of weeks at a time as they continue to soak in those nutrients. There is no science to this; it is a matter of finding what you like.

Step 5: Making Planter Boxes

Now comes the time to create your planter boxes. You should have six or so plastic pots, a box of around 100lt, and a single 100cm aluminum profile.

For this, you would want to lay out the six pots on the lid of the box and mark the center of each one. Then, drill a hole in each of the marks. Use a Dremel next to cut a circle around it that is the right size.

With each pot, drill many small holes in the bottom so the roots can grow out and get into the water. Lastly, you would need to add the aluminum reinforcement across the very bottom of the lid to support the plants’ weight.

The plants will grow in size, thus making them heavier, but you have improved the overall strength of the box to support that additional weight when they become much larger.

Step 6: Creating Pant Buckets

This is very similar to the last step, but it is scaled down a bit. For this, you would need that 19lt bucket and the seven small plastic containers that you could even get by recycling them. This process is a bit easier because you are dealing with slightly smaller buckets instead of larger boxes.

Creating your bucket planter.

Step 6 involves creating plant buckets using a 19lt bucket and seven plastic containers. It’s an easier step because you’ll use smaller buckets instead of larger boxes.

Start by marking the center of each pot and drill a 3” hole. After that, drill several small holes. The most important thing is that you need to paint the buckets black.

The paint color is important because it will prevent the light from reaching the nutrient solution below, which would ultimately cause algae to grow. This would lead to a depletion of the nutrient solution and could make it rot.

This is a quick, easy portion of the process and something you can play around with a little bit. Find the look and feel for your containers that you feel would best suit your plants, and you can feel better about how they will grow over the long run.

Again, this is not a science; it is about personal preference just as much as it is about creating the greenhouse itself.

Step 7: Get The System Started

Remember, this is a simpler design for a greenhouse because we want it to be easy to use and maintain as well. We don’t create a greenhouse, with the thought being that we want to spend a ton of time maintaining it. We simply want to grow what we want to grow and not deal with the unfun parts.

The key here is to ensure that your containers have enough water and add some nutrients each time you refill them; some of the nutrient water will no doubt leak out each time you move things around or check on your plants.

The nutrients you use are ultimately up to you; do a little bit of research to find the right nutrient system for the plants you want to grow. Some might have a better experience with one nutrient system than others; find what you like.

Make sure to fill the container to about halfway full; the seeds will get started because the water will reach the substrate in the pots. Since substrates are super absorbent, the water will eventually make its way upward and keep everything evenly moist, allowing your seeds to sprout.

That is all that you need to get going with a greenhouse of your own! You should start seeing some results after a few weeks of nutrition for the plants you are attempting to grow.

As you continue to work on your system, you will find nutrients that you feel are better for specific kinds of plants; this will become a more comfortable and personal process for you as you go.

Again, the way that this is set up is to promote simplicity. You want to make it easy for your plants to get the nutrients they need without much work on your part. It is simply about creating the environment for your plants to thrive and letting them do the work.

When you begin seeing results, you can tweak what you want to grow based on your use and how often. When you start to feel comfortable enough, you can even start trying out things that you may not have previously considered. The system is in place to let you find success with whatever it is that you decide to grow, and you can be certain that you will succeed if you follow these steps.

Change how you eat and live by implementing your own rooftop greenhouse. You can save money on your food, create a sense of purpose and responsibility, and get the kinds of vegetables and plants you desire most without having to find someone who carries them.

Building your own greenhouse can have a huge impact on your life. Take the steps necessary to build one; you can change how you live, eat, and look at plants. It is an experience that more people are trying. Be one of those people.

Becoming a Conklin Independent Distributor (Full Guide)


A Conklin Independent Distributor is a contractor who partners with Conklin to sell their products to consumers. By leveraging Conklin’s established brand equity and industry-respected products, self-employed roofers can grow their own businesses more effectively.


Steps to Becoming a Conklin Independent Distributor

  • 1) Find a Sponsor
  • 2) Choose an Account Type
  • 3) Select an Enrollment Package
  • 4) Complete the Distributor Agreement


Conklin Independent Distributor Guide (Cover)


How to Become a Conklin ID

Becoming a Conklin Independent Distributor is a multi-step process. Check out the details below:


Step 1: Find a Sponsor

Sponsors are essential to your success as a Conklin ID, as they can lend experience and expertise to help you navigate the challenges of the industry.

Visit https://www.conklin.com/conklindistributor/signup/index/, where you can find available sponsors by zip code, name, email, and distributor ID.

You may also connect with sponsors at conferences or through digital channels like social media.


Step 2: Choose an Account Type

Conklin offers accounts for both distributors and customers. To become an ID, you’ll want to choose the “Distributor” account package.


This package is for contractors who plan to:


  • Promote and Sell Conklin Products
  • Develop a Client Base
  • Assist Other Conklin Independent Distributors


Step 3: Select an Enrollment Package

Conklin offers seven enrollment packages for you to choose from. The “Standard Contractor” package is among the least expensive.


Check them out below:


  • Platinum Contractor Wholesale – ($3,999)
  • Premier Wholesale – ($2,499)
  • Standard Wholesale – ($1,999)
  • Premier Contractor ($1,399)
  • Premier Grower ($1,399)
  • Animal Products Package ($999)
  • Conklin Business Seminar ($999)
  • Standard Contractor ($999)
  • Standard Grower ($999)
  • Vehicle Products Package ($999)


Step 4: Complete the Distributor Agreement

You will then be prompted to complete a Distributor Agreement in which you will enter your personal information, including your name, address, social security number, and any tax exemptions.

After completing the form, you are brought to a checkout page where you can complete the process.


Benefits of Conklin Distribution

You might wonder why roofers choose to become Conklin distributors in the first place.. Below are the key components of Conklin Independent Distributors:


  • Direct Sales: IDs can sell Conklin products through multiple channels, both in-person and digital
  • Commissions: IDs can earn a percentage of generated sales and potentially bonuses and incentives
  • Flexibility: IDs can choose their sales and marketing techniques and hours of operation
  • Support: IDs receive detailed training, promotional materials, and access to a network of distributors


Maximizing Your Conklin Business


Many small-scale roofers would like to grow their businesses but lack the resources and accountability to realize that vision.

A great solution to this common predicament is Conklin Independent Distribution. Becoming an Independent Distributor (ID) allows you to earn instant credibility in your market and start profiting as a commercial roofer.

You will gain access to an expansive library of training material, as well as a management structure that encourages excellence.


Establish a Service Area

Regardless of your current location, you can become an Independent Distributor.

From New York to Texas and Illinois to Louisiana, there’s opportunity available to anyone willing to take advantage. The most difficult part of launching a roofing company is earning credibility.

A large percentage of consumers will not trust unknown commodities, but affiliation with Conklin allows contractors to establish credibility on day one. This makes marketing much simpler and encourages growth at a much faster rate.


Sales and Marketing Strategies

Many contractors don’t have an official business but perform jobs based on word of mouth and friends of friends. Becoming a Conklin ID allows you to turn a side business into a legitimate company.

You might be surprised by how quickly an unknown contractor can increase their demand with a little help from Conklin.

There are so many untapped resources available to contractors throughout the United States, and the time is now to start capitalizing.


Ways to expand your roofing business include:


It would be a shame to waste a business opportunity with so much upside and very little downside. Roofers should view their status as an Independent Distributor as “playing with house money.”

If your business ends up failing, you risked very little in the process and can resume your previous work. Conversely, if you end up succeeding, your business will grow at a considerable rate, and you’ll have access to resources that help you handle the increased demand and workload.

Weighing risk vs. reward should help you arrive at the decision that best suits your vision.


Final Thoughts

Becoming a Conklin Independent Distributor can boost your business. By leveraging the Conklin brand and gaining accountability, you can reach goals that were otherwise improbable.

To learn more about Conklin and its ID program, we encourage you to visit: https://www.conklin.com/conklindistributor/signup/


Callback

Hello! If you have any questions, leave your info below and we'll call you.