Author Archives: Roofers Guild

What is Roof Decking? (Definition, Materials + Types)

What is Roof Decking Graphic


What is Roof Decking?

Roof decking is the material that lays between the structural components of a roof (joists and trusses), the insulation, and the waterproofing layers (coatings, roofing materials, etc.).

The roof deck is the section of the roof where everything else is placed. Because of this, it needs to be strong enough to hold weight and durable enough to cope with having some give.


Roof Decking Material

A wide variety of materials can be used for roof decking. This can include anything from wood to cement, concrete to steel. The material used depends on how much weight it needs to carry.

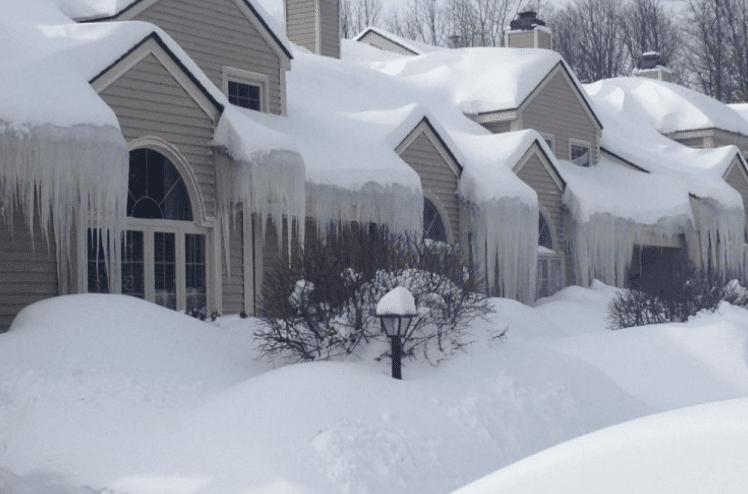
Other factors include the weight of any air conditioning equipment, rainfall in the area, and any potential snow build-up. Special features, something like walking decks or rooftop swimming pools or bars, may also be needed for extra support. 


Types of Roof Decking

Generally speaking, there are three different types of roof decking to keep in mind: tongue and groove, plywood or OSB sheathing, and plank sheathing. Understanding the different kinds can give you a good idea of what to expect out of each.

The type of roof decking varies based on whether you have a commercial or residential need. Residential buildings will likely use wood for the roof decking because it stands up to the weight of just about anything that will be placed on top of it.


Tongue and Groove

Tongue and groove decking is usually done with a 2×6 “tongue” formed on one edge of the board. This is meant to fit snugly into the “groove” in the adjacent board. This can be something of a challenge to replace as it is something that is not readily available in most lumber yards.

Generally, this is a highly durable and stout roof decking. It will only need to be repaired when it has had extensive exposure to moisture. Be sure to take a long look when going over your tongue and groove roof decking.


Plywood or OSB Sheathing

When it comes to plywood or OSB sheathing, you may have seen it before under the false term of Wafer Board. Builders began using this method because it has strength and longevity against splitting.

These methods became increasingly popular in the early 1980s and 1990s and are now almost exclusively used by builders across the industry.

There are a few points that you should definitely be aware of during the installation process. Make sure to install the boards using staggered vertical joints and ensure they are parallel to the ridge line.

The vertical joints that are between the boards have to be supported along the whole length and need to be nailed securely.

It is also vital to ensure that you have sufficient support with an absolute maximum of 600 mm between the two rafters. Those plywood panels should be installed with 3 mm spacing between each panel unless it has been stated differently by the manufacturer.


Plank Sheathing

Plank sheathing, meanwhile, is typically something that was used before plywood. Wood shingles are expensive when it comes time to tear down and replace them, so re-sheathing over the entire roof is a far cheaper method.

Plank sheathing is generally susceptible to distortion, thanks to weather changes. This can result in constant expansion and contraction that can wear down those planks over time, making them brittle with enough expansion and contraction.

It is also important to stagger your joint boards. When a number of those adjacent boards join on the same support or rafter, it can be possible for the deck to move due to all that distortion to a crack line in the singles. All the wood boards must be properly conditioned to maintain moisture equilibrium.

There should also be a sufficient number of fasteners to prevent any kind of buckling, and each board should be fastened with at least two nails in each rafter to ensure that it is held securely but without too much force.


Purpose of Roof Decking

Generally, your roof deck is meant to hold the fasteners to secure the roof. Sure, it can support foot traffic and the occasional snow load that will inevitably happen with any roof out there.

If that wood is compromised, it might not be able to provide the level of holding power that will allow the roof to last its suggested lifespan.

Having a proper roof deck is the foundation of any sound roofing system. The deck is meant to resist gravity loads and lateral loading from things like the wind and other seismic forces.

A proper roof decking will meet design requirements like component anchorage technique, deflection resistance, fire resistance, surface characteristics, and dimensional stability.


Assessing Your Existing Roof Decking

There are several reasons that property owners should be interested in the type of roof deck on the building and its condition. Among them are the following reasons:


  • Condition of the roof deck – is it detached, corroded, unsafe, or damaged? Has the deck been deflected or deformed to the point where it ponds water?
  • Stability – Can the deck handle a much heavier roofing system like a built-up roof membrane with a ballasted single-ply system?
  • Resistance – If the mechanical fasteners are going to be used to attach insulation or a single-ply membrane to the deck itself, will that deck be able to provide the necessary pullout resistance? Some single-ply systems require a more robust steel deck to meet wind design.
  • Removal – Can the deck sections be safely replaced or removed if necessary if the roof needs patching? In the past, removing and replacing deteriorated decking with metal decking and rigid roof insulation was common. This can actually be quite unsafe and is definitely not recommended. Instead, new form boards and galvanized wire mesh should be used. Ensure the galvanized wire mesh is attached to the existing wire near the patch’s perimeter. This is done for safety reasons.
  • Clearance – If the existing roofing is going to be removed all the way down to the deck and the tapered insulation or a sloped fill is going to be the way to solve the ponding problem, you need to know if the clearance at access doors, windows, and other equipment hatches will be imperiled.
  • PV Panels – What about adding PV panels to the building roof? If this is part of the plan, you must know how they will be attached to the structure.

The roof’s decking plays a critical part in supporting the overlaying material. The material itself is certainly important for keeping the elements away and holding up to the constant wear and tear that comes with exposure to the elements. Still, it doesn’t do its job with the proper roof decking.


Addressing Wooden Deck Problems

Ensure to properly ventilate your attic to eliminate any excess moisture that deck panels can absorb. This reduces the amount of shrinking and swelling the wood experiences, helping it last longer without turning brittle and breaking.

If that brittleness occurs, it can compromise the structural integrity of your roof, and you will have to have costly repairs or replacements done immediately to prevent any safety hazards.

Regardless of what style of roof decking you choose, you need to ensure that it is installed properly to get the proper weight support that your roof needs. Consider any additional snow weight if your area sees heavy snowfall so your deck does not bow and crack under additional pressure.

Much like the foundation of your building, the roof decking is the basis on which the rest of the roof operates. Without proper roof decking, your roof will eventually buckle under pressure and must be replaced.

Save yourself a lot of time and labor by ensuring that your roof decking is properly installed and rated to handle the weight on your roof. You can then focus on implementing the roofing materials needed to get the right roof for you.


In Conclusion

Roof decking is an essential component of the roofing system and one that should not be overlooked. From supporting roofing materials to securing the roof’s structural integrity, decking is somewhat of an unsung hero in the system’s design and implementation.

Additional functions of roof decking include weatherproofing, insulation, and ventilation, all of which impact the health and longevity of your roofing system.


Roof Flashing (Types + Techniques)


What is Roof Flashing?

Roof flashing is a thin material—typically galvanized steel—that professional roofers use to direct water away from the critical areas of the roof. It is typically wherever the roof plan meets a vertical surface, like a dormer or a wall.


Roof Flashing Types Techniques


Roof Flashing Types

  • Continuous
  • Base
  • Counter
  • Step
  • Skylight
  • Valley
  • Drip Edges
  • Kickout


The Basics of Roof Flashing Installation

The flashing is installed to surround the features of the roof, such as chimneys, vents, and skylights. Water should then run down the side of the flashing and be directed to the shingles instead of finding a way into the roof deck.


The Purpose of Flashing

Without the roof flashing against those walls, water would slowly drip into the space between the roof and wall and even potentially into the home.

So, what do you do when you need roof flashing? Knowing the different types and the techniques to implement can be helpful.


Roof Flashing Types

There are numerous types of roof flashing to choose from. Check out some examples below:


  • Continuous Flashing. It is also known as “apron flashing” because it acts similarly to an apron. It is a long, single piece of metal used to carry the water down to the shingles below.
  • Base Flashing. Some roof features, like chimneys, require two pieces of flashing to ensure the rain always meets a flashing surface to direct it downward. Not only that, it is notoriously difficult to install flashing around a chimney.
  • Counter Flashing. Placed opposite the base flashing or above the base flashing. Counter flashing completes the team with the aforementioned base flashing.
  • Step Flashing. A rectangular piece of flashing bent 90 degrees in the middle, generally used for wall flashing. In this instance, multiple pieces of flashing will be installed as layers with the shingles to ensure the water flows away from the wall.
  • Skylight Flashing. Some skylight manufacturers include flashing with their products, but others require you to create or purchase it separately. Knowing which option you have beforehand is helpful.
  • Valley Flashing. Any open valleys on your roof have metal flashing in order to protect this area, which is a critical area of the roof.
  • Drip Edges. At the edge of the roof, there is a thin metal flashing that allows water to drip off the roof without damaging the home or causing a pesky leak that can cause further damage to the roof or home.
  • Kickout Flashing. Roofing contractors generally need something to bridge the gap between where the step flashing comes to an end and where the gutter begins. This kind of flashing is used to direct water away from the wall and down into the gutter.


Roof Flashing Materials

You also need to be aware of a few different roofing materials. In the past, these would have been lead or lead-coated materials. Now, professionals throughout North America have switched to one of three materials.


Aluminum Flashing

Aluminum is generally easy for roofers to form and quite lightweight. However, it has to be coated if it is going to be used with masonry and concrete since plain aluminum degrades and reacts when it makes contact with alkaline surfaces.


Copper Roof Flashing

Copper takes soldering well and is also malleable, highly durable, and tends to have a longer-lasting life. On the other hand, there is some discoloring in the patina, which can vary depending on the homeowner. Copper flashing is routinely found around chimneys.


Steel Flashing

Steel is the most popular choice for flashing. In addition to aesthetic value, it is also malleable and corrosion-resistant when galvanized.


Be aware of building codes that may require or disallow a specific material. Have your roofing contractor look into this so that you are covered.


Identifying Flashing Types

There are quite a few types of roof flashing, nearly as many as parts to the roof. Each roof feature requires protection, hence the many different types of roof flashing.

Longer pieces of continuous flashing have trouble flexing as the home contracts and expands during the changing of the seasons. If left alone, it could warp or break and fail to keep that water out. If using longer pieces, they should have built-in expansion joints so that they can move as the home does.

Another benefit to two-part flashing is that when the roofing materials expand and contract with the weather, those two pieces can move, so the system stays secure.


Roof Flashing Techniques

So, how do you properly install roof flashing? Here are a few helpful techniques.


Step Flashing

The best place for step flashing is where the roof face meets a wall, such as where the dormer projects out from the roof. In a spot like this, it is entirely possible that water could flow down the wall and past the shingles into the building below.


Plumbing Vent Boot Flashing

Simply put, vent flashing has a cylindrical piece of flashing that fits around the vent itself. These shingles are installed over the base or the boot. The height of the boot is meant to force water to run around the vent itself.


Counter Flashing

Counter-flashing is commonly used to flash chimneys and involves two flashing pieces. The first piece, the base flashing, is meant to sit around the base of the chimney. The second piece, the counter-flashing itself, finds itself embedded in the chimney’s masonry.

This piece sits over the base flashing, ensuring the water doesn’t slip in behind it. Professional contractors generally use counter-flashing for a litany of other purposes, but it typically involves a second piece of flashing set off from the first.


Before you can learn to install roof flashing, you need to understand the three primary techniques involved. Each one is different and can be suitable for different areas of the roof. There are also flashing types that tend to correspond with a specific technique.

Step flashing ensures that water is properly directed away from the wall and winds up in the gutter. It is called step flashing because it is installed in—you guessed it—steps. The flashing involves layers of shingles between them, so the water gets poured down each step and down the roof.


Nails vs. Sealent

Using a sealant is key when installing roof flashing. Roofing professionals, generally of the old-school variety, still use nails while flashing. While nails can work, the roofer must choose whether to nail to the roof plane or to the vertical wall itself.


Nails

If the contractor decides to nail both, the flashing could deform under the pressure of shifting wood or brick. If they decide to nail only to the roof plane or the vertical wall, the flashing can then stay in place while the other materials contract and expand as the weather changes.

Weather change can wreak the most havoc. If the wrong materials are used or installed improperly, constant expansion and contraction can lead to bent or warped materials, making them more brittle until they finally break.


Cement

Roofing cement is generally accepted as the most common type of roofing sealant because it is meant to create a waterproof seal. Roofing professionals can use a trowel to apply it evenly so that it adheres properly.


Protecting Your Roof

Ultimately, installing flashing and applying a proper sealant is meant to protect your roof and its trouble areas from water and other damaging elements.

Those hard-to-reach areas can be the first to go without proper flashing, so it is imperative for the life of your roof that you have a flash that will expand and contract with the elements and divert the water off the roof.

Amateur roofers, who may not have the necessary knowledge or experience, can miss those tough-to-reach areas. Hiring a licensed and reputable roofing contractor ensures that those trouble areas do not worsen.

If not handled properly, water could pool around vents or the chimney and damage areas of the roof, creating discoloration and even leaks. If left unchecked, those leaks could cause structural damage.

A proper roof flashing can do wonders for protecting your roof from water damage and unnecessary wear and tear to those trouble areas on your roof.


Can You Live in a House While The Roof is Replaced?


Can You Live in a House While The Roof is Replaced

Roof replacements are a significant project that can disrupt the daily lives of homeowners. With this in mind, it’s important to plan ahead to ensure the process goes as smoothly as possible. One of the first choices you must make is whether or not to stay home during the replacement.

Ultimately, it’s your choice whether or not to stay home during a roof replacement, but you are going to have to deal with a variety of disruptions that could impact your decision.


Logo

Key Takeaway

You can live in your house during roof replacement, but there are annoyances you will have to endure during the process. The most important thing is securing your pets and ensuring any outdoor furniture is out of harm’s way.


Roof Replacement Can Be Inconvenient

Whatever the reason, there can come a time when you need to replace that roof and upgrade to something more effective and current than what you might have had. This doesn’t have to be a nightmare scenario if you choose the right roofing company, but it is still going to be inconvenient.

If you choose to leave your home during the process, you will have to make arrangements to stay at a hotel or with family or friends. If you choose to stay home, you will have to put up with various sounds and ensure that your pets are completely safe.


Roof Replacement: What to Expect

Regardless of whether or not you stay home during the replacement, the project itself is likely to disrupt your schedule, one way or another.


You Can Stay Home When Your Roof is Being Replaced

While it can be a sizeable inconvenience to your life, you can still live at home while your roof is being replaced. A roofing company worth their salt will take special care to ensure you are not inconvenienced during the replacement.

Roofers fully understand that you have things to do: raising the kids, household responsibilities, cleaning, taking care of the pets, and any other things that you might have to do.

Of course, you will want to know how long and when to wait for the roofing job to be completed, so you don’t plan any family gatherings or have friends over during the repairs, as that could cause inconveniences to the roofers.


FAQs About Staying Home During Roof Replacement


Are There Major Downsides to Staying Home During a Roof Replacement?

There are things that you will have to put up with, but as long as you follow a few safety guidelines, you should be able to do so without any major concerns or issues while replacing your roof.


How Loud is Roof Replacement?

The replacement process can be very loud, and depending on your noise tolerance, it might annoy you considerably. Take a listen for yourself:


Will Roofers Come Inside During a Replacement?

It depends on where you are in the replacement timeline. There will be periods when the roofer must access the indoors to inspect the attic. But this is done before the replacement.


How Long Does Roof Replacement Take?

With a quality roofing contractor, the job should take a few days to complete, and you can still live and work about your home as normal. However, in some cases, a replacement can take up to 14 days (2 weeks).


How Long Does a Roof Replacement Take

Most roof replacement projects conclude in just a few days, but larger homes may require more extensive projects that can last up to two full weeks or 14 days.


Other Considerations During Roof Replacement


Keep Your Pets Secured During Replacement

One of the more important things to keep in mind during this process is to keep your pets secured during the entirety of the roof replacement. Because there are many new and different things happening, they may not adjust well to these noises and new people in the area.

If possible or necessary, you might want to take the pets out of the home during the repairs that are being done and then bring them back later. You will be thankful that you did it for both the sake of your pets and your sanity.

This might be a good protocol to follow with your kids as well. Make sure that they are not playing around the house while the roofing is being done and that they know to only stay within designated areas so that they do not put themselves in harm’s way or disrupt the roofers at work.


Cleanup Your Outdoor Area

For those with outdoor furniture or any items of value that might be outside, make sure to remove those items before the crew arrives. The last thing that you want is to have something damaged during the process that could have been simply stored away.

Anything that can’t be moved should be properly covered and protected to ensure that it is not damaged in any way. It can also help to make the roofing company aware of these things, especially if they are larger items that can’t be moved out of the way easily.

Another thing to remember is that the replacement process can be fairly noisy. While this is easier to deal with within your home because you are aware of it, your neighbors might not appreciate it very much.

Give them the heads up that you have scheduled to have your roof replaced so that they can make proper accommodations for dealing with the noise during this time.


Coordinate With The Roofing Contractors

Ultimately, the roofing replacement process is more of a team effort than you might think. You need to work with the roofing company to ensure that the process goes as smoothly as possible and that everything is accommodated.

When this isn’t the case, it can make for a rough and uncomfortable experience.

A proper, professional roofing company will take any and all special care to coordinate with you and let you know what is happening each step of the way.

Safety is paramount in these situations, and if there is any major inconvenience that you may have to deal with, the roofing company will be sure to communicate that with you.

Since your roof is your home’s first line of defense, keeping it in the best condition possible is paramount. Keeping it in great condition is important for the investment that is your home and for increasing the equity of your home.

The right roofing replacement professionals will take the most care possible each step of the way and will communicate any issues along the way.

It might not be the ideal scenario, but having your roof replaced does not have to be a massive inconvenience.

It might be a few days of things being out of the norm, but you will be able to move forward with a brand new roof that will protect you and yours for a long time to come.


Final Thoughts

While staying home during roof replacement is certainly possible, there are measures you must take to ensure a safe and relatively tolerable experience.

Of course, you can avoid many of these headaches but staying with a friend or relative or at a hotel during the replacement process.

Still, the choice ultimately comes down to your preference, alternatives, and budget.


Remedies for Water Pooling on Flat Roofs (Tips + Hacks)


Ponding water might not be an immediate threat, but if it persists over time, it can begin to wear on the roofing membrane.

This leads to a decline in the membrane’s lifespan and can cause leaks, which can cause serious problems for the rest of the building.

Thankfully, there are a few different remedies that you can employ to resolve those ponding water issues on your flat roof before it starts leaking.


Water Pooling on a Rooftop (Blog Banner)


Keys to Stopping Water Pooling on a Flat Roof

  • Flush drains of debris like dirt, branches, and twigs
  • Add more drain lines
  • Use a roof plaster to direct water toward the drains
  • Install roof crickets
  • Perform regular inspections and maintenance


Flush Existing Drains

Like the drains in your home, drains on commercial roofs can eventually become clogged with debris. In more extreme cases, these serious clogs can lead to standing water becoming a mainstay on your roof.

To prevent debris buildup, try removing sticks, leaves, and any other rooftop debris from your building’s drainage system. Not only will this allow rain and melting snow to flow away from your building, but it will also prolong the life of your drainage system.

On its own, that debris seems harmless. But when it builds and builds, it can lead to various issues with your roof and the drainage system. Take those preventative measures, and you should see a longer life for your drainage system and your roof.


You can also hire a professional roofing service to come out and perform preventative cleanings on your drainage systems once or twice per year. That should be adequate to keep your drainage system clean and working optimally.

That bit of preventative maintenance might cost a little money in the short term but will save you a lot of time, money, and trouble in the long term.


Fix Low Spots

Despite their name, commercial flat roofs aren’t always completely flat. This is because subtle slopes on the surface of the roof can result from the installation process, weak spots in the roof, or a particular focus of debris or precipitation.

Additionally, qualified contractors understand how to slope a flat roof for drainage. These slopes are meant to facilitate drainage so that there is not a lot of pooling water on your roof.

It helps to remove that extra water off to the edges of the building, where an external drainage system lives, or to designated internal drains that will carry the water away.


One of the flaws of these low spots is that water ponding can occur quite easily. When that happens, the drains can clog with debris and fail to do their job. This leads to a buildup of water that can damage the roof membrane and eventually cause leakage.

A professional roofing contractor can fill those loose areas with a roof plaster to better direct water towards the drains.


Directing as much water as possible to your building’s internal or external drains is the goal.


Add More Drain Lines

If the current drainage system is having trouble effectively removing water from your flat roof, there are a few things that you can look into to help the process along. Though it comes with additional costs, adding additional drains is one of the most effective ways to address this issue.

Flat roofs, particularly those in areas with high precipitation, will sometimes need additional drains to properly clear the water from the roof. Unfortunately, most building owners don’t realize this until they see that water ponding becomes a substantial problem in the wake of a heavy storm.


Most professional roofing contractors worth their salt can install extra drain lines or even widen the existing drains attached to your building to direct excess water away from the rooftop.

Again, this is an extra cost, so most building owners will avoid this option. Still, it isn’t out there if there is a more efficient option.


Install Roof Crickets

When pooling on your flat roof, the water ponds in specific areas. These areas typically are near chimneys or around large vents. The best way to battle water ponding in these areas is to install roof crickets.

Crickets are ridged structures designed to divert melted snow and rainwater around roofing obstructions like chimneys and vents. Because of their positioning or design, those obstructions may have a naturally difficult time draining water on their own.

Adding crickets to these obstructed areas can also help when standing water is typically associated with transitions between roof areas. If you are experiencing ponding water in other areas of the roof, crickets might not be enough. It is important to know how to drain water from a flat roof.


If most of the standing water revolves around those obstructed areas, installing roof crickets can be the remedy you have been searching for.


Re-pitch The Rooftop

One issue your commercial building roof could be having when it comes to keeping away ponding water is that the pitch was not properly designed or installed during the initial process. All roofs need some form of sloping, even if it is subtle.

Without the right amount of slope, the water that builds during a storm won’t be able to drain and will, more often than not, lead to additional pooling across your flat commercial roof.


Re-pitching the roof might be costly, but it might also be the only way to solve consistent ponding issues on your commercial roof. It might be worth exploring other options first, but if you need to make the investment, there are far worse things to do with your money.

If you know what you are looking for, you can actually re-pitch the roof before a problem arises. Sure, noticing standing water is an obvious sign, but maybe you live in an area with many storms and want to take preventative measures.


Replace The Membrane

The membrane of your roof is the protective layer that keeps your roof safe from things like moisture getting into the roof, attic, or other areas of the building. When that moisture builds up in the structure of your building, it can cause substantial structural damage.

When the membrane becomes damaged – which can happen for various reasons, ponding water chief among them – it might be worth simply getting a new membrane for the roof.

Many membranes are designed to withstand ponding water, so it might be a blessing in disguise if you have to replace the membrane of your current roof with a more effective, modern version. An inspector will know how much ponding is acceptable on a flat roof.


You can also perform preventative maintenance to ensure that the membrane stands the test of time.


Inspect once or twice yearly to ensure the membrane is holding up and not worn or damaged in areas.


Compress Insulation

Compressed insulation, another potential cause of ponding water on your commercial roof, can be combated with frequent inspections. If that insulation is insufficient, your roof can also have serious issues.

Compressed insulation is generally caused by heavy roofing equipment resting on the insulation during installation. Repeated treading over the roof area can also cause indentations in the roof, which can lead to pooling.

You must ensure proper precautions are taken with the insulation and during any inspection processes. Damaging the roof through these processes is easy when some care could save you time and money


Keeping your commercial business roof working optimally is one of the most important aspects of owning that building. Your roof is the last line of defense against the elements, and it needs to work properly.

With preventative maintenance and a little attentiveness, you can keep your roof working the way it is meant to work. Don’t let ponding water become an issue for your business when you can use these tips to get rid of that pesky water.


Final Thoughts on Stopping Water Pooling on a Flat Roof

A flat roof has many benefits, but there is one definitive downside: pooling water. This is because flat roofs do not drain water as effectively as their pitched counterparts. Pitch roofs have a natural slope where the water can run down, draining off the roof.

Because these roofs don’t drain water well, they are prone to developing ponding water. Ponding water is defined in the roofing community as water that stands in a puddle on the roof for more than 48 hours at a time.

Several measures can be taken to prevent water from pooling on a flat roof, including flushing the drains, adding more drain lines, installing roof crickets, and more.


TPO vs. Modified Bitumen Roofing System (Cost, Lifespan, Etc.)


TPO vs. Modified bitumen is a common debate for many commercial building owners.

Generally speaking, two kinds of commercial flat roofing systems are most commonly found in the Northeast. These are modified bitumen and thermoplastic polyolefin or TPO. The former has been around since the 1970s and is one of the more traditional methods of flat commercial roofing.

TPO has been around since the 1990s, and both do well in extreme temperatures, both extremely hot and bitterly cold. And given the locale (the Northeast), this is a perfect set of traits to have to stand up to the huge swings in temperature.


However, TPO commercial roofing is surging in popularity. You might not have realized that TPO roofs are installed more than all other flat roof alternatives combined, including a PVC flat roof.

The following post will examine both kinds of roof systems in depth. It will include the cost, expected life and longevity, and overall value of each roofing system so that you can make the most informed decision possible.


Key Takeaway

TPO is clearly better than modified bitumen because of its energy efficiency, longevity, reliability, customization, and versatility. As a result, TPO roofs are also more expensive.


Modified Bitumen vs TPO Cover

Modified Bitumen Flat Roofs

One of the primary benefits of using a modified bitumen roof is that it comes at a lower installation cost. However, one of the biggest disadvantages is that many major commercial roofing contractors have stopped installing them, mostly due to the surge in popularity of TPO roofs. Some have gone as far as to start installing TPO over modified bitumen.

As stated previously, modified bitumen began in the 1970s and became a major upgrade over traditional asphalt roofs of the time. It is termed “modified” because of the addition of substances like styrene butadiene styrene (SBS) or atactic polypropylene (APP), which were intended to enhance both flexibility and longevity of the roof, especially compared to those old asphalt roofs.


Over the years, several issues have arisen with modified bitumen roofs.


Lack of APP Modifier

The first is that, although an APP-modified bitumen roof is designed to resist things like UV-light damage, cracking, blistering, and oxidation, there has been a lack of standards in the industry which has led to manufacturers skimping on the addition of that APP as a modifier.

What is the downside of that, exactly? This omission causes the roof to underperform, leading to costly repairs. In the worst case, it could mean that your commercial roof needs replacing, adding another costly endeavor to your plate.


Drainage Issues

The second issue with modified bitumen flat roofs is that, although the gravel spread over a modified bitumen roof is intended to offer hazard and UV protection, that granular surface makes it more difficult to correct drainage issues and detect leaks.

Those drainage issues and leaks can persist far longer than they might with a TPO roof, which means that there can be a buildup of water that can damage the roof’s structure. When something like this happens, it can create structural integrity issues that can lead to even more costly repairs to your commercial business than you had ever expected.


Fire Hazard

The third issue with modified bitumen flat roofs is that using an open flame torch during installation can be a fire hazard. Mishandled torch use has caused more than a few instances of building burning. The risk here is definitely substantial, and it can be substantial enough that some insurers will not even cover roofers who apply modified bitumen using the open torch method.


Open torch installations of modified bitumen are becoming rarer. That said, the cost of a modified bitumen roof remains appealing to some.


Thermoplastic Polyolefin (TPO) Flat Roofs

TPO is also known as flexible thermoplastic polyolefin (FTPO) roofing. Generally speaking, three different kinds of commercial roof installations involve TPO: ballasted, fully adhered, and mechanically fastened.

TPO is considered one of the best values in commercial roofing because it offers a variety of key advantages. Value and longevity are two of the most critical aspects of a commercial roof.


Eco-Friendly

The tear-resistant single-ply membrane is tough and resists oil, grease, and chemical spills. Not only that, but TPO roof systems are also fully recyclable and UV-resistant. Best of all, TPO single-ply roofing is often considered a “green” option because no plasticizers are included in the formulation process.


Color Variety

One of the cool aspects of the rise of TPO roofs in commercial roofing installations is that many building owners and managers now have the option of selecting from over a dozen colors, including white, which has proven to be energy-saving.

The great thing about this is that now you can match your new roof to the exterior color of your building. This might not seem like much, but matching that color scheme can make your building stand out to passersby.


Reduced Energy Costs

Some of those initial costs of installing an Energy Star-rated TPO roof can be recovered through lower energy costs over the life of that commercial roof. That makes it easier to take on the initial costs of installing the TPO roof to your commercial building.


No Tear-Off

Additionally, it is possible to apply TPO roofing systems over preexisting modified bitumen and metal roofs as long as the current roof is in sound condition and not substantially worn or damaged. Applying the new roofing system over the top of an existing roofing system eliminates additional tear-off costs and will reduce the overall disposal expenses. That is a win-win across the board.


Reheatable and Weldable

TPO is also reheatable and weldable, meaning that it is possible to re-weld any seams that require it years later. Smooth-surfaced TPO roof systems are easier to maintain and clean than granular-surfaced roofs, like modified bitumen. Cleaning and maintaining your roof properly means that the roof will hold up for longer, saving you from having to get a new roof for a long time to come.


Thickness Variance

The thickness of the standard TPO single-ply membranes can vary a bit. The “default” is around 45 mils but can be as big as 800 mils. If your roof is in an area where punctures are more likely – due to falling large branches or other sharp objects – you might want to look into a thicker membrane to ensure that your roof does not get punctured by any of those falling objects.


Installation Quality

As with any commercial roofing system, the installation here is key. Whenever a TPO roof fails, it is often the result of damage done during the installation process. If it doesn’t, it is because seams were not properly welded during the installation process.

These seam failures can lead to leaks or potential catastrophic failures when extreme winds occur, causing wind uplift. While these are certainly worst-case scenarios, they are things to be aware of when installing a TPO roof. When you hire a skilled, experienced roofing contractor to handle the installation process, you generally don’t have to worry about these worst-case TPO scenarios.

The premier TPO manufacturers consistently produce high-quality, longer-lasting TPO membranes that you can be confident in and that will last longer than ever before.


Proper TPO installation methods from a certified commercial roofing contractor will ensure that the TPO roof is installed properly and likely won’t fail.


Final Call: Modified Bitumen vs. TPO (TPO is King)

Despite being cheaper, there are just too many downsides to using a modified bitumen roof to make it a viable option anymore. TPO is more energy-efficient, more reliable, and more versatile than its counterparts in the roofing industry.

Combined with the ability to customize the color of your roofing surface, there is just no matching TPO as a commercial roofing option. They also last longer than bitumen flat roofs, meaning you save on the costs of a potential installation that would occur sooner rather than later with a bitumen roofing system.


When you run a commercial business, there are a million things you must keep in mind and worry about; your commercial roof should be at the bottom of that list. When installing a TPO flat roof on your building, you properly protect it from even the most extreme elements for a long time.

When your heating and cooling bills are far less than ever, you can save a ton on installation costs over the years. You can have confidence in your commercial roof’s ability to stand the test of time and handle the elements easily, allowing you to focus on the most important aspects of your business, like generating revenue to keep that business going.

TPO is the reigning king of roofing materials and will likely continue to hold that spot for a long time.


Roofing Tar vs. Silicone (Analysis & Comparison)


Roofing tar vs. Silicone. Which is superior? While most roofers and property owners are looking for a simple answer to this question, it requires a broader understanding of the specific roofing project that requires such materials.

In most cases, Silicone is a superior roof sealant to tar, though the difference is not as apparent as some might imagine.


Roofing Tar vs. Silicone (Blog Banner)

Key Takeaway

Silicone is the superior roof sealant, but tar is nearly as effective. While you can’t go wrong with either solution, Silicone presents better aesthetic appeal and greater stain resistance.


Perhaps you are in the process of having your roof repaired or replaced. If so, you might have a few questions. One of these is, “What is the best roof sealant for leaks?”

It is important to have the right type of material since there are several different materials to choose from, such as slate, asphalt, Silicone, aluminum, clay tiles, and more.

Generally speaking, it comes down to tar asphalt or Silicone. These materials have distinct advantages, but knowing which is best for you takes a little research and a much more thorough look.


Below, Roofer’s Guild compares the two roofing materials closely.


Installation Process

Installing either roofing material can be relatively straightforward. You can install tar using a roller, but you have to ensure that the temperature is in the right range for it to stick to the roof effectively.

The last thing you want is for the tar to not adhere correctly, which could cause issues with peeling and potential water damage later on.

Ensure the temperature is correct, and the tar will stick to the roof easily.

The only downside to installing a tar roof is the fumes. When the sun hits the mixture, toxic fumes form that can leave you feeling dizzy and cause respiratory issues.

Always wear a mask when installing a tar roof to protect against the side effects. No one wants to get dizzy and fall off the roof while installing it.

The process is a little more time-consuming with silicone shingles but generally easy. There are no adverse side effects regarding fumes, making it a safer option for installation.

Ideally, you should have a roofing professional come out to repair or install your roof.

It can be dangerous to take on the job if you are not experienced, as those without experience often forego or forget the necessary safety procedures that should be taken during the process.

Tar roofing has the overall installation advantage simply because it can be rolled out relatively easily. Yes, toxic fumes are involved, but as long as you wear a mask, you should be okay during the process.


Solar Energy

Silicone shingles reflect UV rays away from your home or business, helping keep the structure cooler without increasing the energy you use through air conditioning or other cooling devices.

Until you see a sky-high utility bill, you won’t understand just how much money that can save you.

Tar, meanwhile, has similar properties. It protects the structure from harmful UV rays and helps keep the building cooler even when the temperature is hot.

This is crucial during the hotter summer months when energy bills can soar.

One of the most important aspects of a roof is appropriately handling UV rays. If it isn’t doing its job, your home could turn into an oven during the hotter months, resulting in excessive air conditioning usage and higher home energy costs.

Both deal with the same problem in very similar ways—keeping those UV rays at bay and reflecting solar energy to keep the building cooler—so either works fine for this specific concern.


Eco-Friendliness 

When it comes to roofing tar, they are very effective at keeping your home or business cooler during those warmer months, up to twice as much as most traditional energy-star certified roofing materials.

The cooling means you can save substantially on your energy bills and see benefits from green organizations like NAHB, LEED, or others.

The one drawback here is that the fumes can be pretty dangerous, but the environmental effects aren’t as harmful.

If you do the installation yourself, be sure to wear a breathing mask to avoid those toxic fumes that could be dangerous to your health.

Silicone is also great for saving money on energy costs while offering protection against staining, dirt, and mildew. This gives it a distinct advantage: it will look newer over time than a tar roof.

The benefits are slight, but the advantage here goes to the silicone option. Both save you from expensive energy bills and are relatively easy to install, but Silicone protects against ugly staining, while tar roofing material has toxic qualities during installation.

Any time you can save yourself by working on your roof, cleaning, or making repairs, that is a victory for you and one you should take.


Aesthetic Appeal

With roofing tar, you are oftentimes limited to black or white. Some companies specialize in offering a variety of different colors, but don’t be surprised if the majority of roofing companies in your area stick with tradition.

Still, if you can find the color that best suits your design scheme, it can match perfectly. Tar provides a smooth, seamless aesthetic without grooves or breaks.

Silicone roofing materials routinely come in various colors and designs, allowing you to be as specific as you want about the color of your roof.

Also, as previously mentioned, Silicone is resistant to staining and dirt, which can cause unsightly spots to appear over time, making your roof look dirty and worn down.

Silicone has the advantage here because of its versatility, choice of color, and ability to protect from things that may stain your roof.
.
While getting different colors of roofing tar is not impossible, it is not as common as selecting silicone roofing.


Durability & Longevity

Durability and longevity are critical factors because of the cost of replacing or installing a roof. Considering this, long-lasting roofing materials are imperative to avoid excessive spending.

Tar roofs are very durable because they remove the seams and cracks that we generally see in roofs and create a smooth surface.

A smooth surface is incredibly important when it comes to dealing with high winds or keeping snow/water buildup from forming on the roof.

The latter is essential. Most roofs experience some level of damage that can lead to leaks or water damage in other home areas. With a tar roof, you drastically limit the possibility of that happening.

As we all know, water damage is a real wild card that can wreak havoc on your home or business.

Silicone roofing material is also very durable. In addition to being resistant to the damage that sunlight and UV rays can cause, it also protects against rain, snow, and extreme temperature changes.

Weather resistance is a crucial factor, especially considering that most of us live in areas where the weather swings drastically depending on the time of the year.

If you don’t have a roof that can withstand a snowstorm, you could find yourself in a pile of trouble before long.

These two are about even when it comes to durability. Both are meant to stand up to extreme temperatures, high winds, rain, and snow. They protect against water accumulation and help prevent problematic leaks from occurring.

The only real difference here is that many silicone roofs come with a 50-year warranty, which should last you for life.

Having that kind of security and peace of mind can go a long way toward picking the right roofing material for your repair or replacement.


Final Call: Roofing Tar or Silicone?

Despite the slight advantage of silicone, you can’t go wrong with either material because of your individualized needs.

While silicone might have a better overall aesthetic value and be more resistant to staining and mildew, tar roofs are more than suitable for most scenarios.

The same goes for being energy efficient – both are great at cutting down on your overall utility bills – and their overall durability.

If you are having your roof repaired or replaced and don’t know which material might be best, consult a roofing professional.

You will be able to discuss your overall goals for the roofing projects, better understand your local climate, and be informed of any weather conditions that could affect your roof.


There’s a Loud Banging Noise on My Roof: Now What?


Loud banging noises from the roof may startle people inside, disturb sleep or work, and prompt concerns about the roof’s condition or structure.

These are normal reactions to have under these circumstances; it’s what you do after hearing the noise that is most important.


Loud Banging Noise on Roof (Blog Cover)

Key Takeaways

The loud banging noise on the roof is typically caused by the expansion and contraction of the materials during winter.

The noise is generally not a cause for alarm. However, investing in a professional roof inspection can diagnose any root cause.


Winter’s Impact on Your Roof’s Banging Noise

Not only does winter bring frigid weather, but it also shortens the window sunlight during the day. This can have a jarring effect on everything from our personal moods to our building’s roofing materials.

As a result, winter is when you might suddenly hear a loud banging noise on your metal roof. The noises can be alarming the first time or two, but they are rarely a cause for panic.

The noises might make you think that there is some kind of lurking intruder or that a tree has fallen on your roof, but they are actually caused by roofing materials being exposed to lower temperatures.

The banging you hear is more likely due to the shrinking of the material than a serious structural issue, though there are always exceptions.


Why Does The Roof Make Noise?

Before you can truly understand what is happening with your roof, the concept of thermal expansion and contraction is something that you should have a handle on.

The materials used to construct your building are all differently affected by the temperature of the environment that they inhabit.

During the winter, when temperatures have declined sharply, these changes can become much more noticeable. Colder temperatures can shrink any exposed materials.

These materials are bound to one another, as well as any interior materials by fasteners (this can include things like nails and screws).

Different materials will contract and expand at different rates; this can mean that all of the materials that encompass your roof are contracting and expanding at different rates as a response to the sudden shifts in temperature. This can cause banging noises and is nothing to necessarily be alarmed about.


Noises Not Necessarily a Cause for Alarm

In most cases, the noises cannot be avoided and are not a cause for alarm. This is particularly true in older regions with large drops in temperature between day and night.

When you put it in perspective, the same expansion and contraction is taking place (albeit in a far quieter fashion) when water pipes are cooled or heated during each use.

The same is true of window and door frames, even in the summer when the temperature cools from daytime to nighttime.


Installation and Maintenance Considerations

Another point that you might not have even considered is that builders are well aware of the effects of thermal expansion and contraction and take that into consideration during construction.

For this reason, they try to choose compatible materials that are adjacent to each other and then tightly secure those connections in order to resist any excessive movement.

Clearing snow off of the roof (especially after a storm that produced several inches or more) alleviates additional weight and reduces the risk of water damage.


Depiction of Roof Expansion and Contraction During Winter

Expansion and contraction of roof materials during winter can cause the “banging” sound on your roof.


Inside Conditions Vs. Outside Conditions

Though your roof’s exterior is constantly exposed to the shifting temperatures of winter, your property’s interior stays generally warmer. These competing temperatures cause the inside heat to constantly move upward toward the cold outer portion of the roof.

As a result, the roof itself shrinks due to the cold, while the rest of the house does not. This contrast can cause a buildup of pressure and distortion.

When that pressure builds up, the joints and other areas where connections are made end up moving slightly; this creates banging noises that might startle you during those cold nights.


Insulation Won’t Make a Difference

While adding more insulation may reduce the banging sounds caused by expansion and contraction, it will not eliminate them entirely. Ultimately, the roof remains exposed to exterior elements like outside temperatures.

For example, adding more attic ventilation may minimize contraction and expansion by reducing the attic’s daytime temperature, but the banging will persist because of the outside elements.

With that said, attic insulation can help muffle the sounds of the metal banging on your roof during winter.

However, taking this measure is more about personal preference than a legitimate structural concern. The roof’s builders were likely aware of the potential of this noise when constructing the roof.

If the banging becomes more frequent or louder in nature, it might be worth calling in a contractor to perform an inspection.

Consulting with a professional is the only way to explicitly determine if the sound is caused by structural damage or any other potentially severe roofing issue.


Final Thoughts on Loud Banging Noises from Roof

In most cases, your metal roof acts as any other material would in the colder months. That constant expansion and contraction of the materials during changing temperatures is nothing more than a cause for annoyance at best.

While the banging noise might be alarming or frustrating, it is often part of having a metal roof in colder regions of the country. Little can be done to alleviate this issue, and it is something that many property owners tolerate during colder months.

So, don’t freak out the next time your roof starts to bang. It’s just doing what nature makes it do.


How Long Do Rubber Roofs Last?


With proper upkeep and weather conditions, your standard rubber commercial roof will last 40 to 50 years.

Of course, this assumes proper and preventative maintenance. No roof will last half a century on its own without preventative maintenance.

While that may sound like a hassle, preventative maintenance entails simple inspections and patchwork that address minor damages before they accumulate.


If your area experiences extreme weather each year, the rubber roof life expectancy decreases by a few years. Still, rubber roofs are generally very durable and meant to last a long time.


How Long Do Rubber Roofers Last (Blog Cover)

Key Takeaway

A typical rubber commercial roof will last between 40 and 50 years with the proper maintenance and mild weather patterns.


Benefits of Rubber Roofs

If you are a contractor or are familiar with the roofing game, you may have heard of EPDM. This is Ethylene Propylene Diene Monomer, more commonly known as rubber roofing.

Most contractors will recommend that commercial property owners invest in these rubber roofs.

Rubber membrane roofs have advanced durability, life expectancy, and cost per square foot, making them one of the best replacement options for any damaged roofing material.


And while it certainly has disadvantages, there are more than enough reasons that EPDM roofs are one of the most common options for commercial properties.


Ease of Installation

Properly installed rubber roofs make your roof seamless. Without seams, your roofing is more moisture-resistant and virtually leak-free.

With other roofs, there is the risk that shingles or individual panels could peel and rise, exposing the roof underneath to the additional risk of leaking.

But with the seamless rubber roof installation, you no longer have to worry about those pesky leaks.

Rubber roofs have the same properties as PVC, TPO, and other roofing materials that are more expensive to install. Again, it all comes down to the quality of the installation.


Subpar or faulty installations eliminate the full range of capabilities that the rubber roof can offer.

Lightweight

Your standard rubber roof weighs just about two pounds per square foot. This makes it lighter than something like modified bitumen, but it remains more durable.

Being lighter in weight also means that it puts less stress on the roof over time. This can do wonders for the health of your commercial roof over the life of the building.

Its lighter weight also means that it is easier to transport and install. Heavier materials are challenging to move up and down ladders or stairs, but rubber material is more user-friendly.


Durability

Rubber roofs are very durable, on a level with PVC and TPO. EPDM is actually durable enough to support things like rooftop gardens as well. Because the material is seamless, it can lock out moisture and prevent the growth of fungi or other roof-harming life forms.

With proper installation and yearly preventative maintenance—inspections to check for any cracks in the façade that could allow moisture to enter—your rubber commercial roof should last at least 40 years.


Professional Rubber Roof Installation

The first course of action for installing a rubber roof should be to call in a commercial roofing contractor.

A contractor or roofer will have a litany of experience when it comes to installing these roofs, and the chance that something goes wrong will drop drastically.

If you insist on doing the work yourself, you must follow certain steps to ensure that the job is done correctly and that your rubber roof is installed properly.


Rubber Roof Installation Steps


Roof Cleaning

The first step is to prepare the roof. This means cleaning it. Any debris or dust that remains could potentially weaken the membrane’s adhesive.

The whole point of the EPDM membrane is that it needs to be able to stick to the roof’s surface.


Gutter Inspection

The next step is to inspect areas of your roof with gutters. In these spaces, you may need to install a batten to extend your roof towards the gutter.

This will direct rainwater drips to the gutter instead of behind it, preventing damage to the supporting wall and fasteners underneath the gutter itself.


Secure Flashing

Make certain that you prepare the areas of your wall that would accept flashing—this redirects moisture from the wall towards the rubber membrane—and remove any excess brick mortar using a mortar chisel.

This will ensure that the flashings attach properly.


Apply Rubber

Lastly, prepare and install the rubber layer. Again, it is key that the rubber membrane bonds with the roof because this is how it seals and becomes seamless.

Apply the rubber to the roof evenly, and make sure to unfold the rubber after you have finished applying the adhesive.

This ensures it won’t dry out without attaching to the membrane. When you are done applying, cut away the excess rubber to complete the fit.


Final Thoughts on How Long Rubber Roofs Last

Rubber roofing is becoming more common due to its greater durability and lower installation costs. If you own a commercial building, you may want to consider installing a rubber roof to prolong its lifespan.

With proper installation and a favorable climate, a rubber roof can last 50 years.


4 Effective Options to Drain Your Commercial Flat Roof


One of the most common issues with flat commercial roofs is water accumulation. That’s why finding effective ways to drain your commercial flat roof is critical to its long-term health.

When water does not drain effectively, it pools up and damages the roof and underlying structure.

This can be especially devastating when there is damage to the façade of the roof. This means that water gets into areas it is not meant to be in (think leaks) and then permeates throughout the rest of the roof. 

This can lead to additional water damage and potential structural damage that can be dangerous for the building and its inhabitants.

Thankfully, there are a few ways to ensure the water drains from your flat commercial roof, keeping it free and safe from potential water damage.


4 Options to Drain Your Flat Roof

  • Gutters
  • Scuppers
  • Interior Drains
  • Edge Drains

Gutters

Gutter systems, one of the most commonly used solutions, are also very cost-effective drainage solutions for flat roofs. 

As the water rolls off the roof’s edge, gutters catch that rainwater and then divert it down into a downspout, which dispenses the water a safe distance away from the building’s foundation.

Ultimately, this prevents rainwater from rolling off the roof uncontrollably and running down the side of the building. Uncontrolled dripping can damage things like windows, siding, and even the foundation of the building itself.


However, there are disadvantages to using gutters as the primary drainage system on a flat roof. The first is that gutters need consistent cleaning to do their job effectively. 

When debris, like leaves, builds up in the gutter, it blocks the flow of water. When the debris is not cleaned out, the water builds up and then overflows, running down the side of the building.

Gutters are also very susceptible to damage from ice, severe weather, and heavy debris buildup. 

These are factors to consider when looking for drainage solutions for your flat commercial roof.


Gutters Drain Infographic

Scuppers

Scuppers are perhaps one of the most effective drainage solutions for a commercial flat roof. Using this system, large square openings are made along the edge of the roof, shooting the water safely away from the side of the building.

Downspouts can also be installed directly below the openings, which catch water and drain it away from the building in a controller manner similar to the gutters.

Flat roof scuppers also have several benefits. In addition to being cost-effective, they are much easier to maintain, meaning you won’t have to clean them as you would gutters. 


Those wide, large scuppers will rarely get clogged by debris, and a well-designed scupper can even enhance the overall aesthetic of the building, making it look a little bit nicer than traditional gutters would.

Like anything else, however, downspouts have downsides. If you install the downspouts above, they risk getting clogged, requiring regular checks for debris buildup. They can also be quite ineffective for heavier snowmelt and rain.

Also, scuppers tend to be less effective on a flat roof with no pitch to guide the water to the edges of the building; the scuppers have to be somewhat cleverly designed to have the best overall effectiveness.


Scuppers Drain Infographic

Interior Drains

These are similar to how the drain in your sink or shower might work. These drains would be placed in the roof areas where the water will most likely build up. 

The interior drains would then lead the water through a system of pipes installed below the roof. The water would travel through the pipes until it was dispensed into a gutter or downspout on the side of the building.

Using an interior drainage system has some notable benefits. The first is that the walls and foundation of the building are protected from water damage. 


The second is that the pipe system is protected from damage by the roof and walls, reducing the chances of freezing or cracking. 

Lastly, this type of system is highly customizable, so you can get the exact kind of system you want.

There are downsides, however. This is the most expensive option due to the nature of the installation and customization.

Additionally, any damage that does occur must be repaired by a professional roofing technician.


Interior Drains Infographic

Edge Drains

Edge drains work just as they sound: they sit at the roof’s edge and collect the water there.

It operates very similarly to a public shower. Scupper drains are similar in that the goal is to prevent water from running down the side of the building and causing additional damage.

Edge drains are a simplistic way to divert water from running down the side of the building. 

They point the water to a predetermined destination so that it can drain safely away from the building without causing any damage.


Edge Drains Infographic

Final Thoughts on Flat Roof Drains

Whatever the solution, drains are necessary for the life of your roof. If left unchecked, water buildup can lead to substantial issues over time.

Failure to address water pooling on your flat roof system often leads to serious and expensive consequences. 

As a result, be sure to get your drainage system in place and ensure it works correctly.


4 Ice Dam Prevention Tips for Metal Roofs

Ice Dam

Key Ice Dam Prevention Tips

Minimize Warm Air: Identify and Seal Air Pathways To Your Attic

Measure Attic Insulation: Determine the R-Value of your Attic Insulation

Add Additional Floor Pads: Adding More Floor Pads Will Help Prevent Heat from Escaping

Ensure Ventilation: Ensure The Roof Includes Either Soffit Vents or One Foot of Gable Ventilation (or an Alternative Roof ventilation) Per 150 square feet of The Attic Floor

One winter issue that you may need to worry about, particularly if you have a metal roof, is what is known as an ice dam. An ice dam is where ice and water become trapped on a portion of the roof and catches any flowing water. This can be particularly bad for your roof.

Ice dams can cause a number of different issues for your metal roof. The water can get under the metal shingles, raising them up and leaking water down onto the roof below. This can cause heat loss as well as damage to your attic space as well as further structural damage to the wood surrounding that area.

What Causes Ice Dams to Form?

This occurs when the heat that is inside the house rises up to the attic space. There it continues to rise until it reaches the apex of the roof.

That warm air then warms up the top of the roof itself; this causes the snow that has built up there to melt, and that water runs down the surface of the roof.

When it reaches the colder edges that are at the bottom of the roof, that water then refreezes and forms a wall of ice (or a dam). That ice then traps additional water, causing icicles and additional ice and water to build up.

Preventing Ice Dams on Your Roof

So, what can you do to prevent those ice dams from building up and causing substantial damage to your metal roof over the winter? Here are a few helpful tips that can go a long way toward keeping your metal roof protected.

1) Minimize The Impact of Warm Air

The flowing of warm air really aids in the buildup of water, which then causes the ice dams to form. In order to prevent the ice dams from forming, you need to ensure that the warm air is kept to a minimum when flowing outward to the roof.

You can do this by first sealing the air leaks that can lead to the attic space. Locate those little pathways where the warm air can rise up inside the attic and make sure that they are properly insulated. This is an effective long-term solution to solving the ice dam problem that plagues so many metal roofs.

The first step is properly identifying those holes and then sealing them. You can use something like weather stripping to make sure that they are properly insulated and then make sure to seal all of the holes through which that warm air can escape into the attic.

2) Measure Attic Insulation

The next step is measuring your attic insulation so you can bring up the level of the attic floor if necessary. Most homes within a snow-belt zone will be required to have a level of attic insulation that is around R-49, as rated by Energy Star.

Older homes are generally not properly insulated, which means that you have to have additional floor insulation added to your home’s attic. To do this, you need to find out what the current level of insulation is in your attic.

You can grab a ruler and measure the height of the insulation in your attic and then multiply that height in inches by 3.14, and that will give you your attic’s current floor insulation R-Value.

If your level of insulation isn’t where it needs to be, you will have to purchase additional levels of energy-efficient floor insulation pads for your attic to ensure that it is properly insulated from the cold. This will help keep your roof from getting those annoying ice dam buildups.

Ice Dam Icicles

Icicles are just part of the problem with ice dams. You may have to buy floor insulation pads for your attic to insulate it from the cold.

3) Add Additional Attic Floor Pads

One of the most important things to do here is to ensure that you are not putting the insulation into corners where the attic floor and the roof walls wind up meeting.

This is because it can create something of a cold area near the edge of the roof; this can contribute to ice dam formation, and it can block the air in-flow as well.

That additional attic floor padding will help to properly insulate your roof so as to keep it protected and to keep that additional heat from escaping into the roof itself.

That additional insulation will go a long way towards preventing the buildup of ice and water, which leads to those pesky ice dams building up on your roof.

4) Ensure Proper Attic Ventilation

Next, make certain that your attic is also ventilated properly. First, you need to check to see if you have soffit vents installed. These are designed to drive cold air into the attic, and you will be in good shape if you have them.

If you don’t have soffit vents, then you will need to have gable vents installed as an alternative. Generally speaking, you want to have one foot of that gable ventilation or any alternative roof ventilation for every 150 square feet of your attic floor.

When you ensure that you have proper ventilation, you prevent the buildup of heat that can melt water and cause it to become trapped in areas of your roof, causing those troublesome ice dams to form.

It might be a bit of a hassle, but ensuring that those ice dams do not form can mean the difference between a properly functioning roof and one that can become damaged and cause issues with your roof.

Final Thoughts on Ice Dam Prevention

Prevent ice dams with these relatively easy steps, and you can ensure that your metal roof holds up during even the toughest of winters. The key points to remember are minimizing warm air, measuring attic insulation, adding more floor pads (if necessary), and ensuring proper attic ventilation.